
Using Coloring Pages in My Art Journal

In the first Colorful Blessings coloring book, many of the drawings were drawn from my art journals. Now with the second book, Colorful Blessings - Celebrating Everyday Wonders, finished and being published by Taunton Press (released in June), I am beginning to use the coloring pages in my art journals. I thought you might like to see some of my process.I began by choosing images that resonated with the journal I'm working on: My Word of the Year Journal, and my word FLOW. The journal is made out of watercolor paper. Here I chose "Nurture Tranquility" from the first Colorful Blessings coloring book, and "O the Deep, Deep Love of Jesus" page from the second book, Colorful Blessings - Celebrating Everyday Wonders.

1. First, I cut out the part of the image I want to use. Because it was to be glued onto an accordion page folding outward, I cut the image where it will be glued along the outward fold.

2. I wanted to plan more of what would be on the pages shown. Knowing I would write quite a bit on the pages, I decided not to coat the pages with matte medium (I use DecoArt Media or Golden Matte medium). Instead, I wrote/sketched out my words lightly in pencil first.
3. Then I wrote the text in pen, over the pencil. After waiting for it to dry thoroughly, I erased the pencil lines with a white pen eraser.
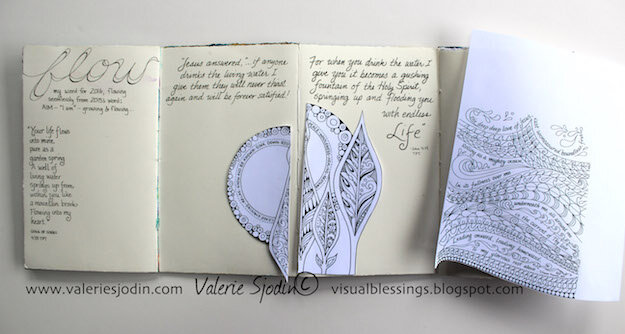
4. I reduced and printed a copy (laser printer or photocopy with non-waterbased ink) of the second coloring page so it would fit on the right-hand side page. I cut off the bottom portion I wasn't going to use. and left the other two edges, so I could tear the page edges like the rest of the journal.
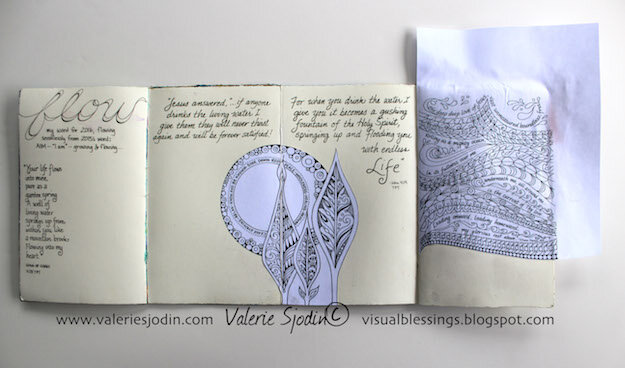
5. I put deli paper (any paper will do) under the pages so they wouldn't get matte medium on them and stick together. I brushed the entire surface of the pages with matte medium and blued the coloring pages down, brushing more matte medium on top of the coloring pages to seal the entire surface of the journal. Let dry.
After it was dry, I tore the edges of the second coloring page to line up with the torn edges of the journal page. Now I was ready to paint and add collage papers. Yay! My favorite part.
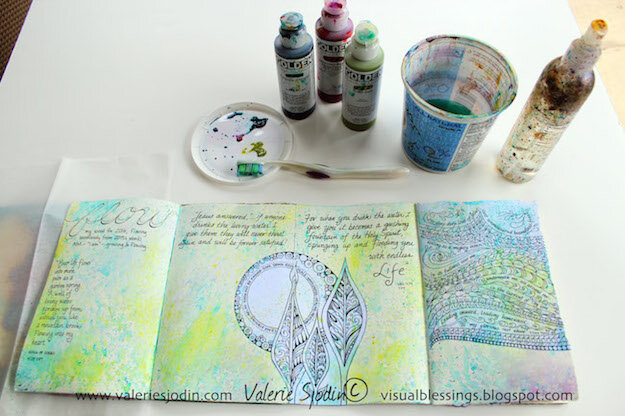
6. I spattered fluid acrylic lightly with a toothbrush and spritzed it with water. I used Golden Pthalo Turquoise, Quinacridone Magenta and Green Gold. Let dry.
7. I looked through my Marbling & More papers and found my "water" type of papers. I cut waves, swirls, paisleys etc and glued them down with Matte Medium.
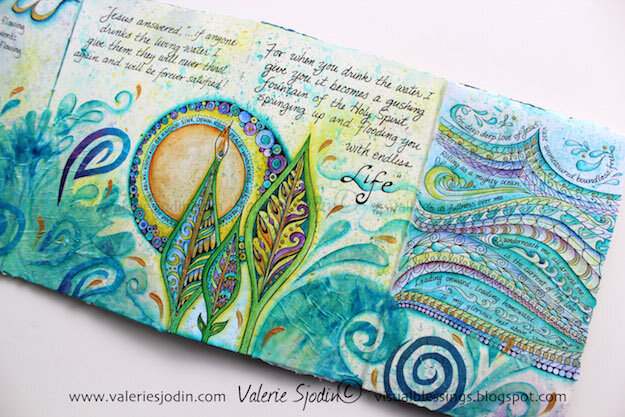
8. Then I painted the coloring pages and tinted around the collage elements to integrate them more into journal page. Similar techniques are taught in the Hope journal in my
Marbling & More and Lettering & Doodling Hope online classes
Here are the Amazon links to the supplies used for the journal pages in this post:
Blog Affiliate DisclosureTo make the products I talk about in this blog and videos more accessible and to answer product questions, I've affiliated with Amazon.com. I do not get paid for using any of the products and only share products I use often, and am pleased to recommend them. I get a number of questions regarding the products I use. I thought this would be the win/win opportunity for you and I. If you click on any of the Amazon product links above and purchase the product, I receive a small percentage, like a tip. It does not cost you anything.Content, images and text in this post and entire blog are copyright© Valerie Sjodin 2009-2016. For your personal inspiration only. Commercial use prohibited.