
NEW! My Favorite Matte Medium and a Step-by-Step Experiment!
Matte medium is one of those products I use very often in art journaling, a staple really. I've tried a few various kinds and get a lot of questions about it. Well, I have had the opportunity to try a new one and am happy to announce I am thoroughly pleased with this matte medium, my FAVORITE! It is
DecoArt's Media Matte Medium:

http://decoart.com/mixedmedia/
It has a lovely smooth, clear finish and spreads easily and evenly. So far, I have used it to seal in my doodling before applying other layers. Using a soft, inexpensive filbert or flat brush, I've brushed the matte medium on the paper before using other techniques. I have glued tissue paper onto gessoed paper with great results (also using a brush), and glued paper onto my journal pages with good adhesion.
It's hard to get the exact feel and look of it in a photo, but here are a few examples of pages where I've used DecoArt Media Matte Medium:

I also experimented with
DecoArt's Antiquing Cream
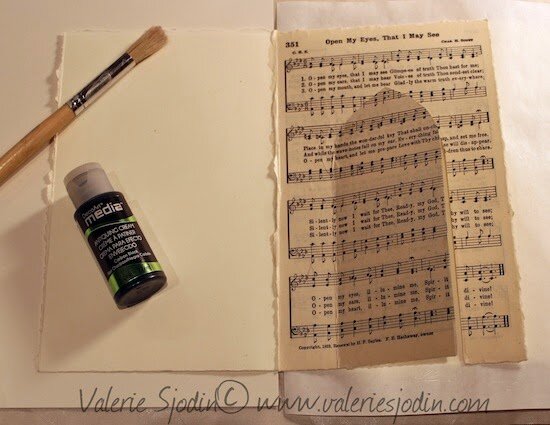
. Usually I can get an antique parchment look with just paint and water and sometimes with adding glazing liquid. Sometimes people have a hard time not getting hard edges and having it look naturally aged, so I thought I'd try this product which has an unlimited working time. Here are some step-by-step photos of the progress made in a recent art journal page as we are getting ready to close 2014.

Steps for above photo:
First I drew the doorway and cut out the door, leaving the left side uncut.
Then with a bone folder, I creased the left side of the door
Then I coated the entire page with matte medium and let it dry.
Next I glued the music onto the journal page with matte medium, and brushed the medium on top of the music so that the entire two-page spread was now coated with the matte medium.
When It was dry, I turned the page and on the back of the page where I could see the cut line for the door, I cut along the cut lines of the door with a craft knife.
I gently opened the "door", folding along the crease made at the left side of the door to make a hinge so the door would open at least part way.
I wanted it to look aged parchment, so this was my chance to try out the antiquing cream.
I branched out with the product a bit and used a dirty brush technique with the black antiquing cream, quinacridone gold and burnt umber fluid acrylics. You can see I used very little of all three, one dot each. The dirty brush technique is when you dip part of the tip of the brush into one color and then another. And in this case, also with the antiquing cream (which is really more like the consistency of the fluid acrylics).

I didn't know if the combination of the three would still allow the antiquing cream to be workable longer or if it would smear when I put matte medium on top of it when I was done. Happily, the antiquing cream allowed me to move the paint/cream mixture around, blot and rub it around with a cloth-like paper towel, and get just the look I wanted. After I let it dry, I brushed on a coat of matte medium. No smearing. Yay!
I moved onto the next step, making the door using DecoArt Burnt Umber and Carbon Black Fluid Acrylics.

You can get info on these products and more at:
http://decoart.com/mixedmedia/
Now my favorite part, doodling and the text. I drew and wrote some of the basic parts in pencil and then went over it with pen, and then paint, using my usual techniques.
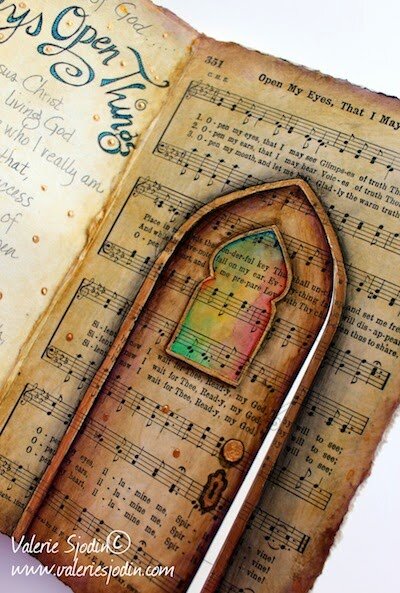
The door of a new year and a new season of opportunities is beginning to open...