

March is here! Full of hope of Spring and new beginnings. Green is a favorite color of mine and often finds its home in this months calendar. This month is truly a month of new beginnings with two grandbabies due. I'm celebrating with the nesting dolls and words and symbols of their names. We also have a grandson's birthday this month marked with Washi tape stars.

Five years ago before going to Ireland, I read a biography and did some research on St. Patrick. Visiting St. Patrick's cathedral was a highlight for me. Years before that, learning about St. Patrick and Celtic Christianity rescued my faith. The way he lived out his faith with God and others is truly inspirational.
Although telling St. Patrick's story is well worth writing about, this post is more of a childlike and lighthearted project. It's a little early for St. Patrick's Day, but in case you want to make these cute and easy tags or card for the celebration, I wanted you to have this info early in March. This Irish themes art is inspired by the eminent birth of our two grand-babies who scheduled to be born in March.
In this post you will find a how-to video, list of materials used in the video, and still step-by-step photo guidelines for making the cute nesting doll tag.
Materials Used:
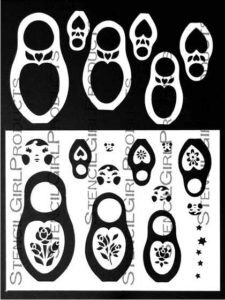
StencilGirl® Products Stencils:
Other Supplies:
Water-soluble Scribble Sticks (I’m using CaranD’ache Neocolor II Water-soluble Wax Pastels
Micron Pen (I’m using size 02)
Tag or ATC card (or any card or art journal page that can take water)
Filbert or flat watercolor brush about 3/8” or 1/4” wide
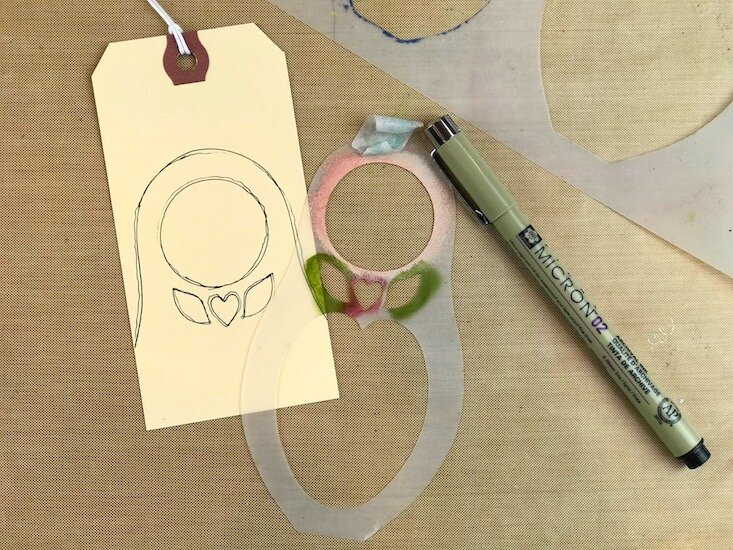
1.Trace around a body mask of Nesting Doll (L694) on a tag or ATC card with waterproof pen. My line went off track so I drew a second scribbly line around the whole thing.

2. Choose a crown from the Doll Crowns Stencil (S667) and trace inside the Stencil with the pen twice.

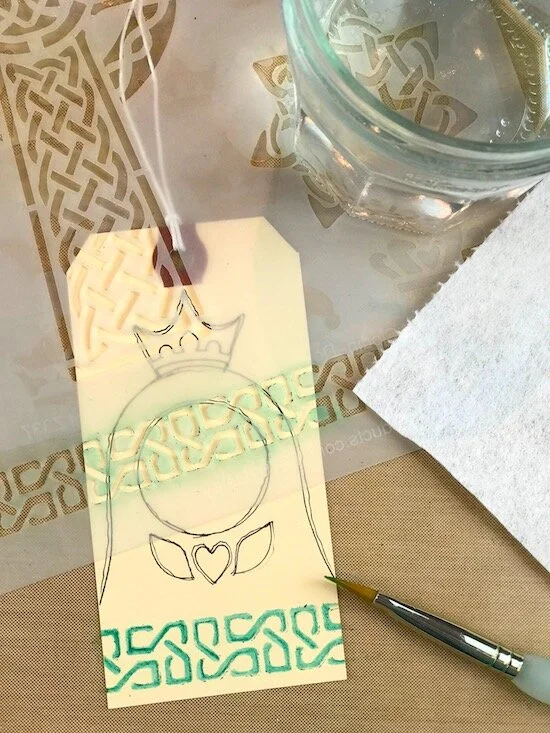
3. June Pfaff Daley has designed a great stencil: Celtic Celebration Stencil (L279) .
I’m using it here with Water-soluble crayons to draw inside the pattern of the stencil border.


4.Use a slightly wet brush to brush the stencil with water.
When I dip my brush into water or rinse my brush out, before I paint on a stencil I touch the brush to a paper towel, so there won’t be too much water that will bleed under the stencil.
5.Put the Doll stencil-mask back on the tag and color in face with flesh color using water-soluble wax pastels.


6. Color in the heart and leaves with the pastels.
Using 2 colors of green and 2 colors of red will add interest and variation to the colors.


7. You can add shading around the edges with slightly darker flash color if desired.
Then paint with water using a slightly wet brush.

8. Color around the edges of the doll, fading in toward the center.

9. Shade the edges with a darker green or other color you desire.
10. Brush with slightly wet paint brush to smooth out and brighten pigment.


11. Put the Doll Crowns Stencil back on the crown drawn.

12. Color in with desired color.

13. Remember to touch the wet brush to the paper towel before painting the water on the stencil, over the crayon.

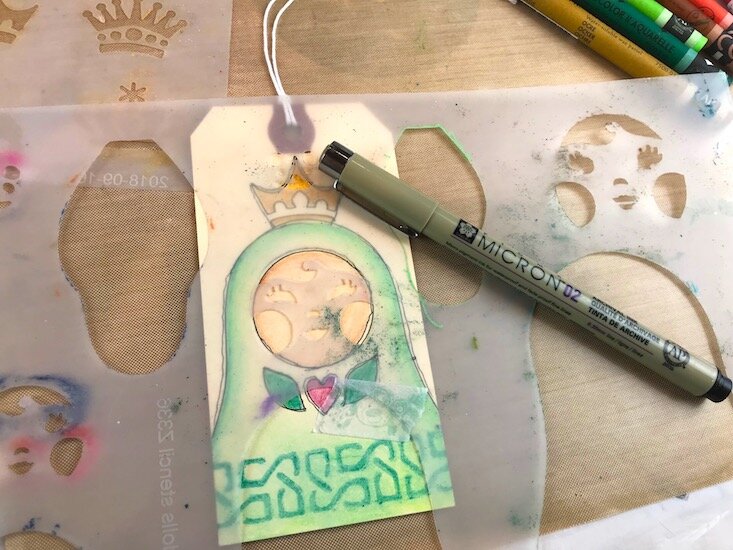
14. Tape the face part of the doll stencil onto the tag face.

15. Make simple eyes by drawing eyes with a Micron pen where the eyeballs would be in the stencil.

16. Finish both eyes and trace around the lower part of the nose and mouth stencil.
17. Add doodles & embellishments to the crown, hair, and heart clovers if desired.


18. Color with water-soluble wax pastels and paint with water.

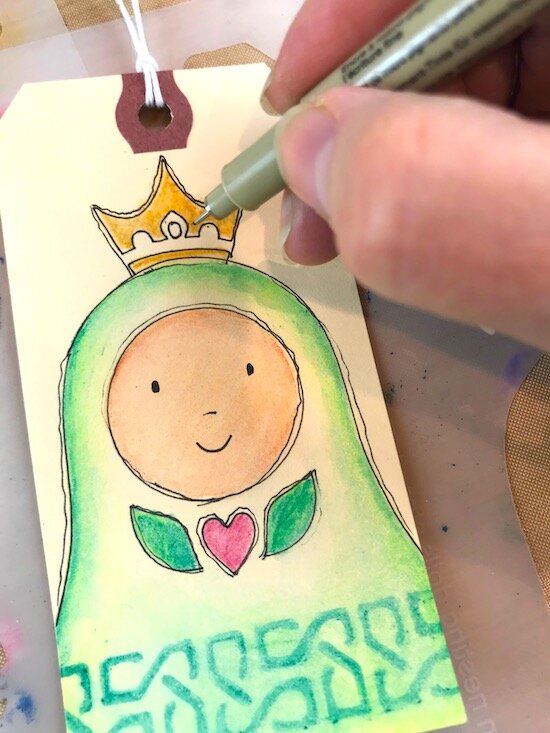
There are so many ways to use this nesting dolls and personalize them using various stencils.Here is the tag, an ATC card and journal page.
Stencils used in this photo:
Nesting Dolls Stencil - L694
Doll Crowns Stencil S667
Celtic Celebration Stencil L279
Scalloped Border Small Mask S644
One of my goals for this year is to be more light-hearted and joyful. Making this tag to give has been light-hearted fun, sweet and easy and just in time to celebrate St. Patrick’s Day. I hope you are inspired to make your own and you have as much fun as I did making it.
Blessings of Childlike Wonder!
Love,
Valerie
Stencils Used in This Post

StencilGirl® ProductsCeltic Celebration by June Daley9x12" L279

StencilGirl® ProductsDoll Crowns6x6" S667
https://www.stencilgirlproducts.com/stencil-Nesting-Dolls-Valerie-Sjodin-p/l694.htm
StencilGirl® ProductsNesting Dolls Stencil9x12" L694

StencilGirl® ProductsScalloped Border Small Mask6x6" S644
StencilGirl® ProductsMid-Century Modern Banners9x12" L711
To See All Stencils designed by Valerie Sjodin Click Here
[